Skip table of contents

Upgrading MMFiles to RocksDB in ArangoDB

There are two different storage engines ArangoDB has supported, MMFiles and RocksDB. RocksDB is the preferred storage engine for Centro instances. The RocksDB manages its memory usage more efficiently than the MMFiles engine. Also, MMFiles is deprecated from ArangoDB since v. 3.6.0. 

ArangoDB has installed with RocksDB as the default storage engine since v. 3.4.0. However, if your Centro instance originated before that and you have not purposely upgraded the storage engine, it may still be using the MMFIles engine.


To upgrade MMFiles storage to RocksDB storage when upgrading to ArangoDB 3.6.x,


1. Identify if using the MMFiles engine.
  1. Login to the ArangodDB GUI management application.
  2. Select and enter into the _system database.
  3. In the upper right portion of the page, appears the storage engine used.

mmfiles example

rocksdb example


2. Backup your database.

To create a back up of the datasbase,

Windows
  1. In  a powershell window or command prompt window, navigate to the C:\Progarm Files\ArangoDB3 3.x.x\usr\bin.
  2. Type the following to create the backup.
      .\arangodump.exe --server.database ActifyDB --output-directory "dump"
  3. Verify in the dump folder, there are around 100+ files forming the backup.
CentoOS
  1. Type
    arangodump --server.database ActifyDB --output-directory 
    "dump"
  2. Verify in the dump folder, there are around 100+ files forming the backup.

As with any set of backup files, take care and save them off to another system in case something were to occur to the current system. 

Also see System Backup.
3. Stop the ArangoDB service.

Stop the ArangoDB process.

Windows
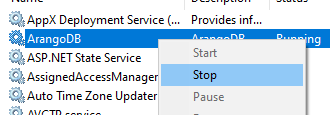
  1. Open the Services window.
  2. Find the ArangoDB service.
  3. RMB and select Stop.
CentOS
  1. Type,
    systemctl stop arangodb3
  2. Check the status with
    systemctl status arangodb3
4. Upgrade ArangoDB to v3.6.x.
Windows
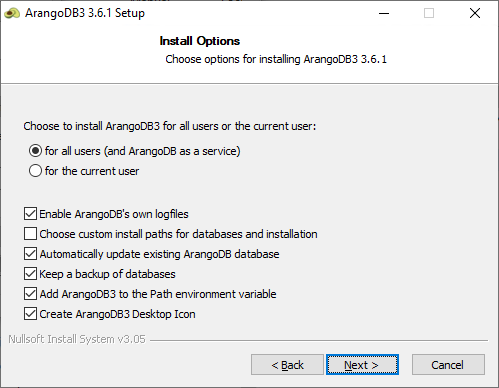
  1. Install ArangoDB 3.6.x.
  2. Start ArangoDB when complete.
CentOS

Community Version

  1. cd /etc/yum.repos.d/
  2. curl -OL https://download.arangodb.com/arangodb36/RPM/arangodb.repo
  3. yum -y install arangodb3-3.6.4


Enterprise Version

  1. cd /etc/yum.repos.d/
  2. curl -OL https://download.arangodb.com/9c169fe900ff79790395784287bfa82f0dc0059375a34a2881b9b745c8efd42e/arangodb36/RPM/arangodb.repo
  3. yum -y install arangodb3e-3.6.4


5. Extract the data from the database.

Currently, your database is still using the MMFiles engine. First we must extract the data from the _system database as well as the ActifyDB.

To extract the data, 

Windows
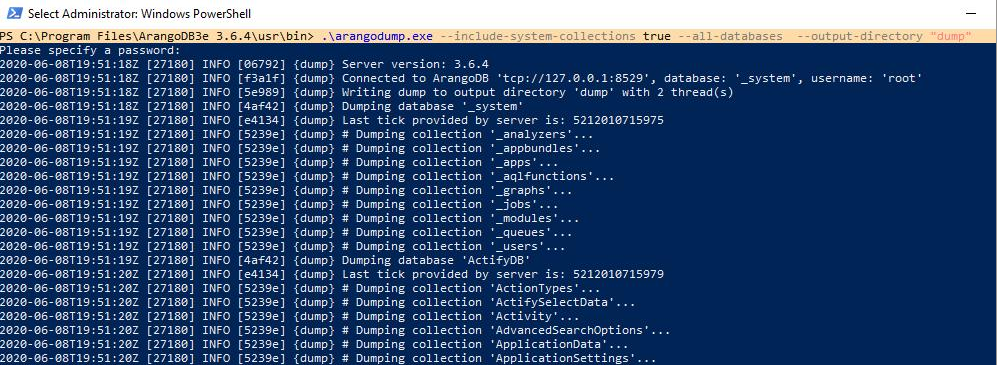
  1. In  a powershell window or command prompt window, navigate to the C:\Progarm Files\ArangoDB3 3.6.x\usr\bin.
  2. Type the following to create the backup.
      .\arangodump.exe --include-system-collections true --all-databases  --output-directory "dump"
  3. Verify in the dump folder, there are two folders, _system and ActifyDB.
CentoOS
  1. Type
    arangodump --include-system-collections true --all-databases --output-directory 
    "dump"
  2. Verify in the dump folder, there are two folders, _system and ActifyDB.
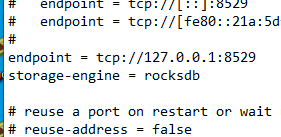
6. Edit arangod.conf

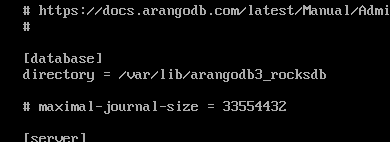
The storage engine is configured in the arangod.conf file. To do this however, a new storage directory must be created forming a blank database. The database will be populated when the restore step is taken.

To edit the arangod.conf file,

Windows
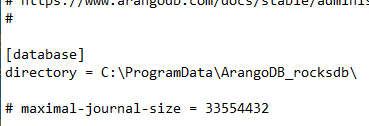
  1. Open arangod.conf found in C:\Program Files\ArangoDB3 3.6.1\etc\arangodb3\.
  2. Change the storage-engine value from auto to rocksdb.
  3. Change the database directory value to a new folder.
  4. Verify your endpoints are correct.
  5. Save the file.

Note: The database engine is considered new so the root password now is empty. It will be restored once the database data is restored.

CentOS
  1. cd /etc/arangodb3.
  2. Open arangod.conf in your favorite editor (e.g. nano arangod.conf).
  3. Change the storage-engine value from auto to rocksdb.
  4. Change the database directory value to a new folder.
  5. Save the file and exit (^X).
7. Restart the ArangoDB service

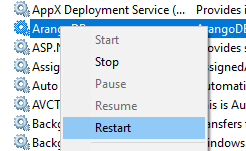
For the changes in the arangod.conf file to take affect, the arangodb service must be restarted.

To restart the ArangoDB service,

Windows
  1. Open the Services window.
  2. Find the ArangoDB service.
  3. RMB and select Restart.
CentOS
  1. Type,
    systemctl stop arangodb3
  2. Check the status with
    systemctl status arangodb3

Once this is done, you will be using the RocksDB storage engine for ArangoDB, however your database will be empty.

NOTE: There won't be a password for the root user.

8. Manually create an empty ActifyDB database.
  1.  in the ArangoDB GUI, click DATABASES. (Note: Your root user will not have a password until you perform the restore. At that point your root password and other users will be as they were before)
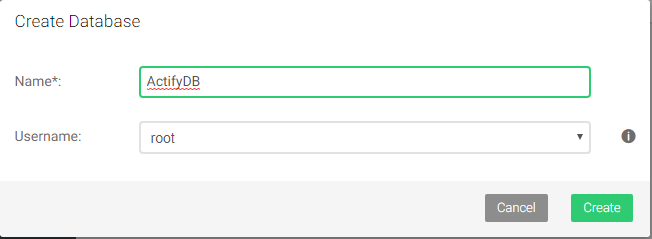
  2. Click Add Database.
  3. Enter ActifyDB as the Name.

9. Restore the database data.
Windows
  1. If not already there, copy the dump folder into C:\Progarm Files\ArangoDB3 3.6.x\usr\bin for convenience.
  2. In  a powershell window or command prompt window, navigate to the C:\Progarm Files\ArangoDB3 3.6.x\usr\bin.
  3. Type the following to restore the database data.
         .\arangorestore.exe --include-system-collections true --all-databases  --input-directory "dump"


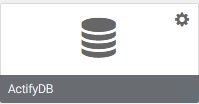
You should be able to check via the ArangoDB GUI the collections in the ActifyDB database are now populated as well as your system users.

CentOS
  1. Type the following to restore the database data.
      arangorestore --include-system-collections true --all-databases  --input-directory "dump"


You should be able to check via the ArangoDB GUI the collections in the ActifyDB database are now populated as well as your system users.

10. Test the upgrade,

First, go back into the ArangoDB GUI and ensure the storage engine being reported is RocksDB.

Next, go through your Centro instance and check,

  1. your data is intact
  2. Centro's behavior is as expected
11. Clean up the server.

Once you feel confident your database is operating successfully you can clean up the extra files and folders used for this operation.

Files and folders to consider saving off or deleting

  • Back up files
  • Extraction files
  • Files in the previous storage directory changed in the arangod.conf file (typically, C:\ProgramData\ArangoDB)

If you have Already Installed 3.6.x

If you've already upgraded to ArangoDB 3.6.x then,

  • Back up your database and
  • Start with step #5 from above.
JavaScript errors detected

Please note, these errors can depend on your browser setup.

If this problem persists, please contact our support.