Skip table of contents

Managing Projects

Projects helps an organization restrict access to specified parts.

In the Catalog, users and parts can be given project associations; only those users associated with a given project can search, view, add and edit parts associated with that project.

Note

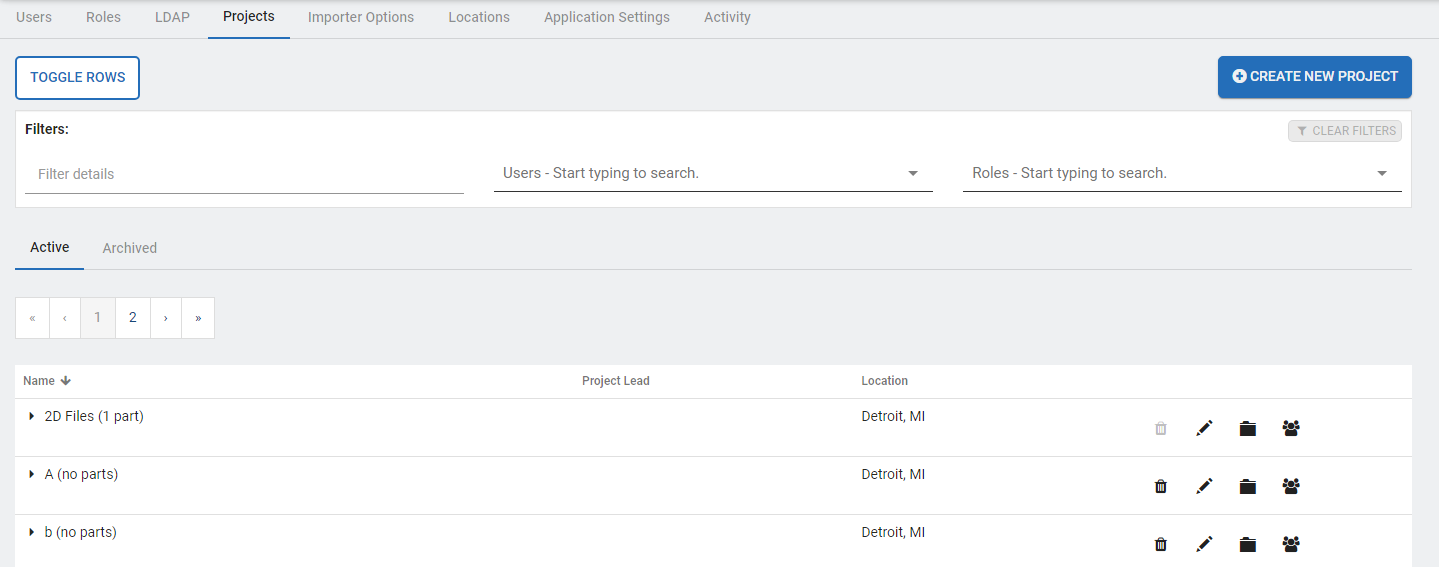
Use the Toggle Rows button to expand/condense the data displayed in all the rows.


Create a New Project...
  1. Log on as an administrator, then click the Projects tab.
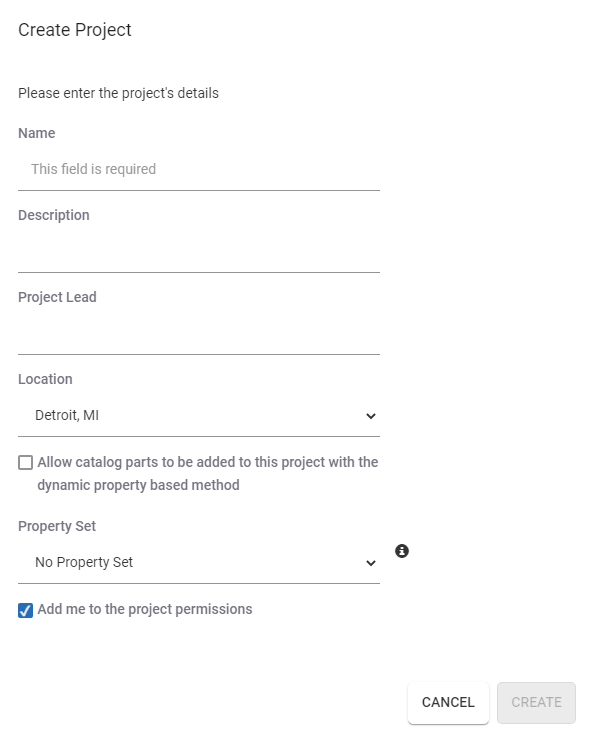
  2. Click the Create new project button.
  3. Complete the Project Name, Description, and Project Lead fields.
  4. Set a different location than the default if desired.
  5. Associate a property set (optional) for future project filtering. See Managing Project Custom Properties.
  6. Click the Create button.
Find a Project...

If your organization has a large number of projects listed on the Projects tab, use the Filters section to narrow down the list.

Project Details

Enter text to search for a project name, description, and/or project lead.

Users

Select a user from the dropdown list to see project codes associated with that user.

Roles

Select a role from the dropdown list to see users associated with that role.

Add/Remove/Change Users...
  1. Log on as an administrator, click the Projects tab in the Admin Area.
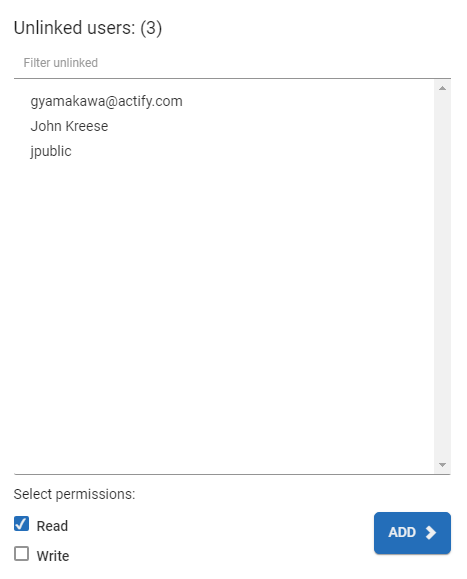
  2. Locate the project, click the Modify User Access button.

  3. Select a user in the list of Unlinked users.
  4. Select the corresponding Read/Write permissions checkbox(es).
  5. Click Add.
  6. Click Save.
Add, Change, or Remove Roles...
  1. Log on as an administrator, click the Projects tab in the Admin Area.
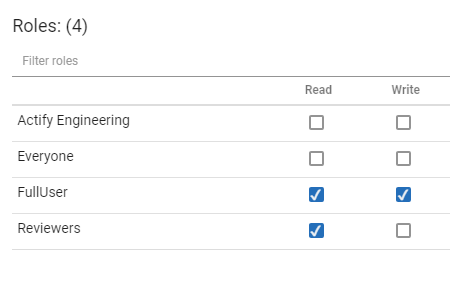
  2. Locate the project, click the Modify User Access button.

  3. In the Roles list, select the corresponding Read/Write permissions checkbox(es) for the appropriate roles
  4. Click Save.

Edit a Project...
  1. Log on as an administrator, then click the Projects tab.
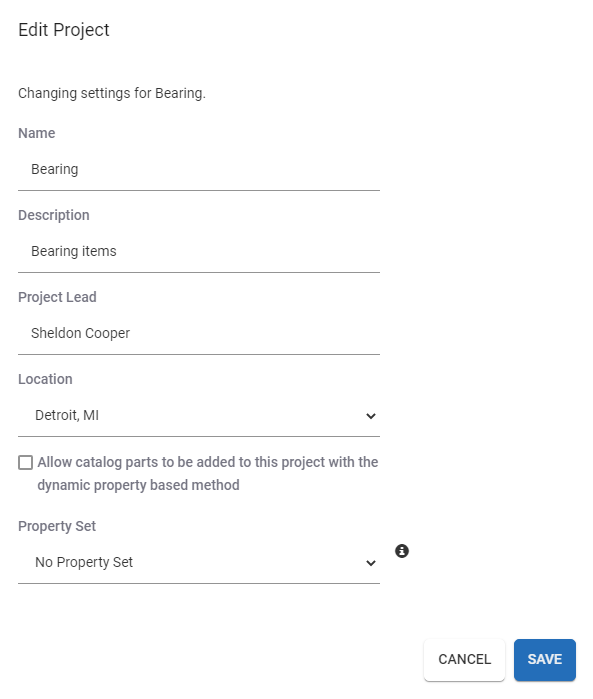
  2. Locate the project name in the list, then click the edit icon.
  3. Edit the Project Name, Description, Project Lead, Location or Property Set.
  4. Click the Save button.
Archive a Project...

Projects cannot be deleted, but can be archived or made inactive. Once archived, a project can no longer be edited nor can additional parts be associated with it.

Archived projects can be viewed in the Catalog with all associated parts.

To archive a project:

  1. Log on as an administrator, then click the Projects tab.
  2. Locate the project name in the list, then click the archive icon.

    When the project has been archived, a confirmation message appears.
Activate a Project...

A project may have been archived prematurely or simply needs to be reopened. To do this one must Activate the project..

To activate a project:

  1. Log on as an administrator, then click the Projects tab.
  2. Click on the Archived tab.
  3. Locate the project name in the list, then click the activate icon.


JavaScript errors detected

Please note, these errors can depend on your browser setup.

If this problem persists, please contact our support.